
Mechanical Integrity? MI
When it comes to a mechanical integrity (MI) program in PSM, there are an almost overwhelming number of items that need to be considered as part of the program. If you’ve ever tried to put one together from scratch, it can be daunting. The trick is to divide and conquer. Rome wasn’t built in a day and neither was your system, so don’t expect to tackle all of this at once. There are a few key steps that should be followed when building an MI program for your refrigeration system, so let’s go over the basics:
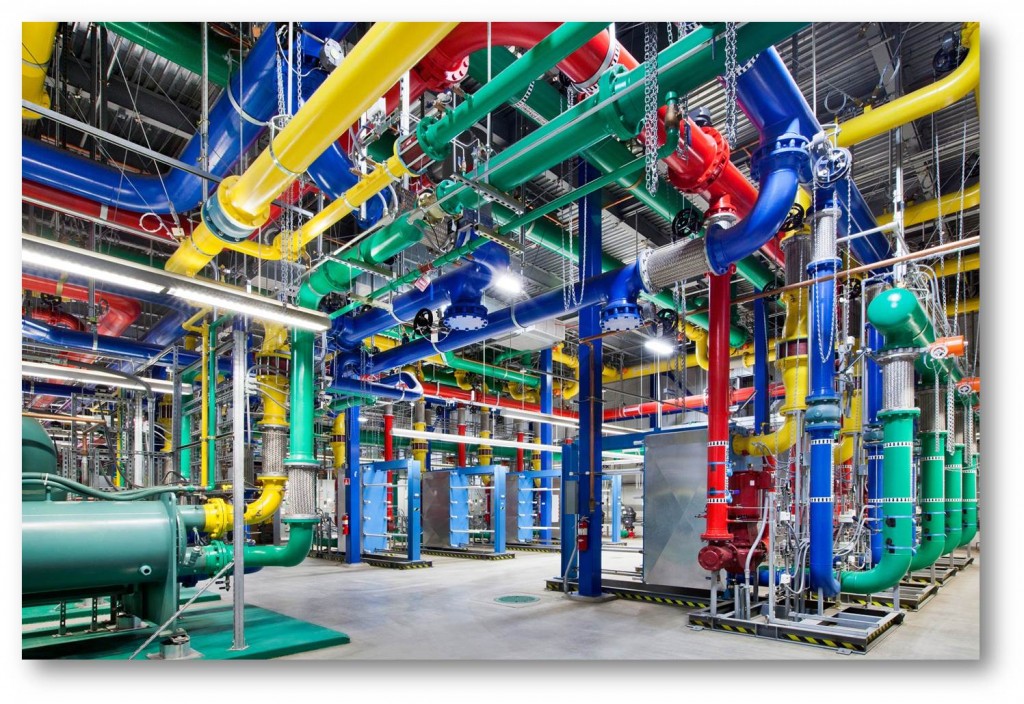
Covered Equipment
One of the most common questions asked when developing the MI Program is, “What equipment should be covered?” The long and short of it is that if the equipment can affect your system it needs to be covered under your PSM program’s MI Element. The easy items to identify are the pieces of equipment that actually run the system (compressors, evaporators, etc.) Where this topic gets more complex is the supporting equipment. In your facility’s Process Hazard Analysis there should have been a number of safeguards identified that you rely on to keep your equipment safe and working. These safeguards need to be included in the MI program because their operation is now part of the refrigeration system. Equipment that is usually listed here consists of items like ammonia detectors, safety cutouts, transducers, and level sensors. Often missed are items that go deeper into the operation of the system. If you have a computer controlled refrigeration system, are your VFDs and PLCs functioning properly? What about the battery backup power supply for your control computer? You’ve probably already figured out that this list can grow rapidly, so it’s often best to sit down as a team and go over what equipment affects your system.
Scheduling PMs
Once the equipment list is complete, now we have to set up the PMs for each piece of equipment. This will take the largest amount of time in setting up the MI program because there are multiple resources that you will pull from to create your schedule. The first thing to do is to group your equipment based on what type of equipment it is: For example, we’ll pick the compressors. Using the manufacturer’s equipment manual, make a list of the inspections, tests, and PM tasks recommended for the unit. The next step is to find your Industry RAGAGEP (Recognized And Generally Accepted Good Engineering Practices) which will most likely consist of the recommendations listed in IIAR Bulletin 110. Compare that to the manufacturer’s list that you have, adding the missing items and deciding on what schedule to follow when there are any conflicts. Document your reasoning if you decide to follow a different schedule than what the RAGAGEP states. Once this schedule is complete, make sure that it holds true for each of your compressors. There could be minor changes that you will want to create another list for such as different types of compressors (screw, reciprocating, rotary vane) or manufacturers. When you’re comfortable with this process, rinse and repeat to build a list for all of the other equipment in the system. These lists make it much easier to set up your computerized maintenance management system if that’s how you set up work orders for the maintenance staff.
The Big Picture on Testing and “MI-Audits”
There are many tests and inspections you have to consider as part of the PM program, including calibration and verification of transducers, gauges, safety cutouts/floats, etc. Beyond that, there might be some equipment specific tests recommended by your manufacturer such as oil testing and vibration monitoring on compressors. These all make sense for the upkeep of the equipment, so what other guidance can we get from our RAGAGEP? If we read into IIAR Bulletin 110, we come across what the industry commonly refers to as the “5-Year MI Audit.” The bulletin states that this is to be a full inspection of your refrigeration equipment by an “independent” person, meaning that person is free from the immediate commercial and production pressures of the facility being inspected. As for what is included in the inspection, that’s left up to the person inspecting your system. As a result, content can vary depending on who performs the inspection but there are some key basic items they should be looking for. These items include inspection of vessels and piping that are both insulated and uninsulated, Non-Destructive Testing (NDT) if necessary, and pressure testing if necessary. Keep in mind that if you still have good insulation and the vapor barrier is still intact, you shouldn’t have to cut the insulation open to inspect the equipment. The bulletin goes into further detail on these topics in the section “Independent Full Inspection.”
When further testing is needed, NDT is the common method for determining the integrity of the vessel or pipe. There are multiple ways to perform this, but the two most common methods are ultrasonic testing and x-ray testing. Ultrasonic is often used because facility maintenance personnel can easily be trained to operate the equipment and it’s less expensive than the x-ray approach. The drawback is that you will have to find (or create) an exposed surface of the pipe to get a good reading, which usually means cutting a measurement hole in the insulation. This also limits the number of locations you can test at without compromising your entire system. While it is more expensive, x-ray scanning can see right through the insulation and give you a reading for the entire pipe run. Remember that you will most likely still need to perform ultrasonic testing on your vessels because of their size. One other method that works as a sort of “quick-check” is infrared scanning. This can clue you in on the condition of the insulation since you can to see the heat envelope, but there is no way to measure the thickness of your equipment using this method. This could potentially be used in conjunction with ultrasonic testing to help identify trouble areas and measurement locations.
The Best Laid Plans….
The key to making any plan or goal successful is to implement! All too often facilities will have a very nice MI Program on paper, but the actual system condition hardly reflects this. There has to be an oversight function in the MI program to make sure that the schedule is still sufficient. Depending on the conditions at each facility, this gives you the opportunity to customize your MI program to keep your equipment in the best condition. A large part of this is the discovery of deficiencies in the system. No system is perfect, so eventually your inspections, rounds, or walkthroughs will uncover items that require “unplanned maintenance.” The standard is very clear that something must be done, but it’s up to your facility to decide how to do it. The key here is right from the wording of the standard, stating that these deficiencies must be corrected “before further use or in a safe and timely manner when necessary means are taken to assure safe operation.” Option one is to shut down your system until the problem is fixed, which is unlikely for most small items if your business is going to continue to operate. Option two is to come up with a safe way to operate until the issue is resolved. In many cases, it’s not difficult to pick option two and manage the system safely but the plan to do so is rarely documented. This documentation, as well as the instructions to operators on what actions are expected in these situations should be stated or referenced in what we commonly refer to as “guidelines.” This is basically the instruction book to your MI Program and should be a go-to reference for maintenance personnel when they have a question on how a certain issue is handled. Consistency is the key to improving the mechanical integrity of the system, and once the whole team is on-board you’ll have a program that everyone can be proud of!
